Automation Node: Field Update
Overview
The Field Update Node in Automations now supports cross-record updates. You can update fields from one record type to another across:
Lead → Opportunity
Lead → Lead
Opportunity → Opportunity
Dynamic Activity → Lead
Dynamic Activity → Opportunity
This enhancement ensures your data stays consistent across the student journey — without requiring any manual updates.
Why This Matters
Student interactions span across various records: form fills, counselling calls, webinars, and more.
In most systems, these are stored in silos:
Leads capture digital behaviour
Opportunities track conversion
Activities log interactions
Without automated field syncing, data can get lost, delayed, or duplicated.
This update solves that by:
Syncing fields automatically
Reducing manual data entry
Improving counsellor visibility
Enabling faster, contextual follow-ups
Examples
1. Update Lead after student attends event
Dynamic Activity logs webinar attendance → updates Lead's “Engagement Score” and “Next Follow-up Date”
2. Create Opportunity with context from Lead
At Opportunity creation, fields like “City”, “Qualification”, etc., are auto-filled from Lead
3. Update Opportunity based on user input
If a student selects “State = Bihar” in a digital form, the related Opportunity is automatically updated with that information
4. Maintain continuity in reopened Opportunities
If an old Opportunity is closed and a new one is created, fields like “Counsellor Notes” and “Preferred Course” can be carried forward
5. Sync flags or support needs
If a counsellor marks “Learning Assistance Required” on a Lead or Opportunity, that field can be synced across all related records
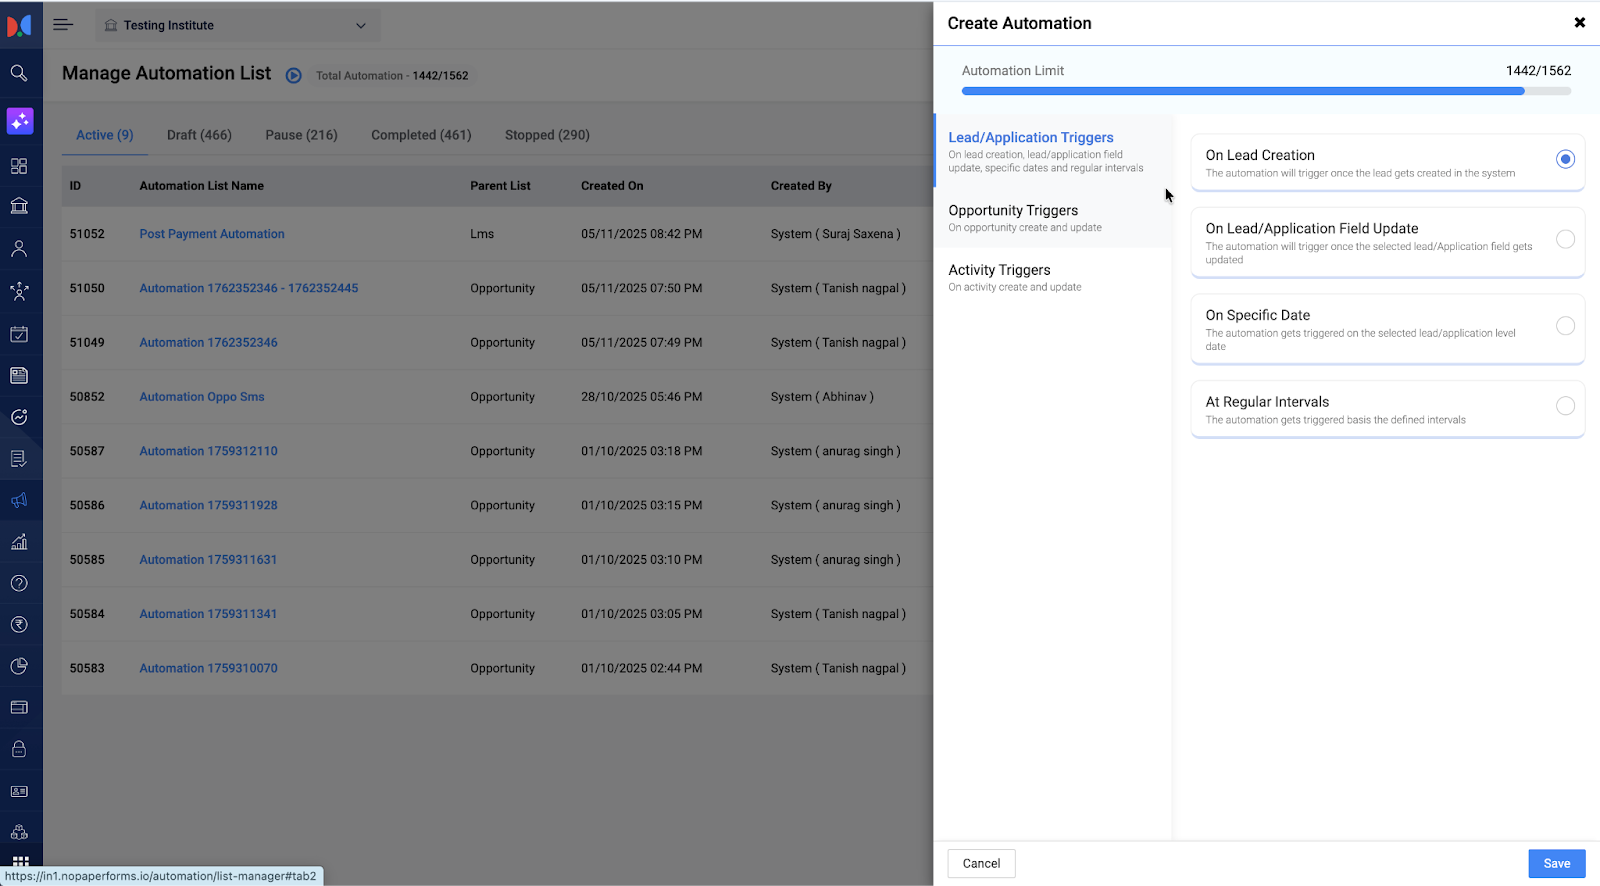
Supported Triggers
You can start the journey from any of the following:
Lead
Lead > Creation
Lead > Field Update
Lead > On Specific Date
Lead > At Regular Intervals
Opportunity
Opportunity > Creation
Opportunity > Field Update
Activity (Telephony or Dynamic)
Activity > Lead > Telephony > Creation
Activity > Lead > Telephony > Field Update
Activity > Lead > Dynamic Activity > Creation
Activity > Lead > Dynamic Activity > Field Update
Activity > Opportunity > Telephony > Creation
Activity > Opportunity > Telephony > Field Update
Activity > Opportunity > Dynamic Activity > Creation
Activity > Opportunity > Dynamic Activity > Field Update
Fields You Can Update
Lead fields
Opportunity fields
Supported Field Types
Text (including alphanumeric and numeric)
Date
Dropdown
Types of Updates You Can Perform
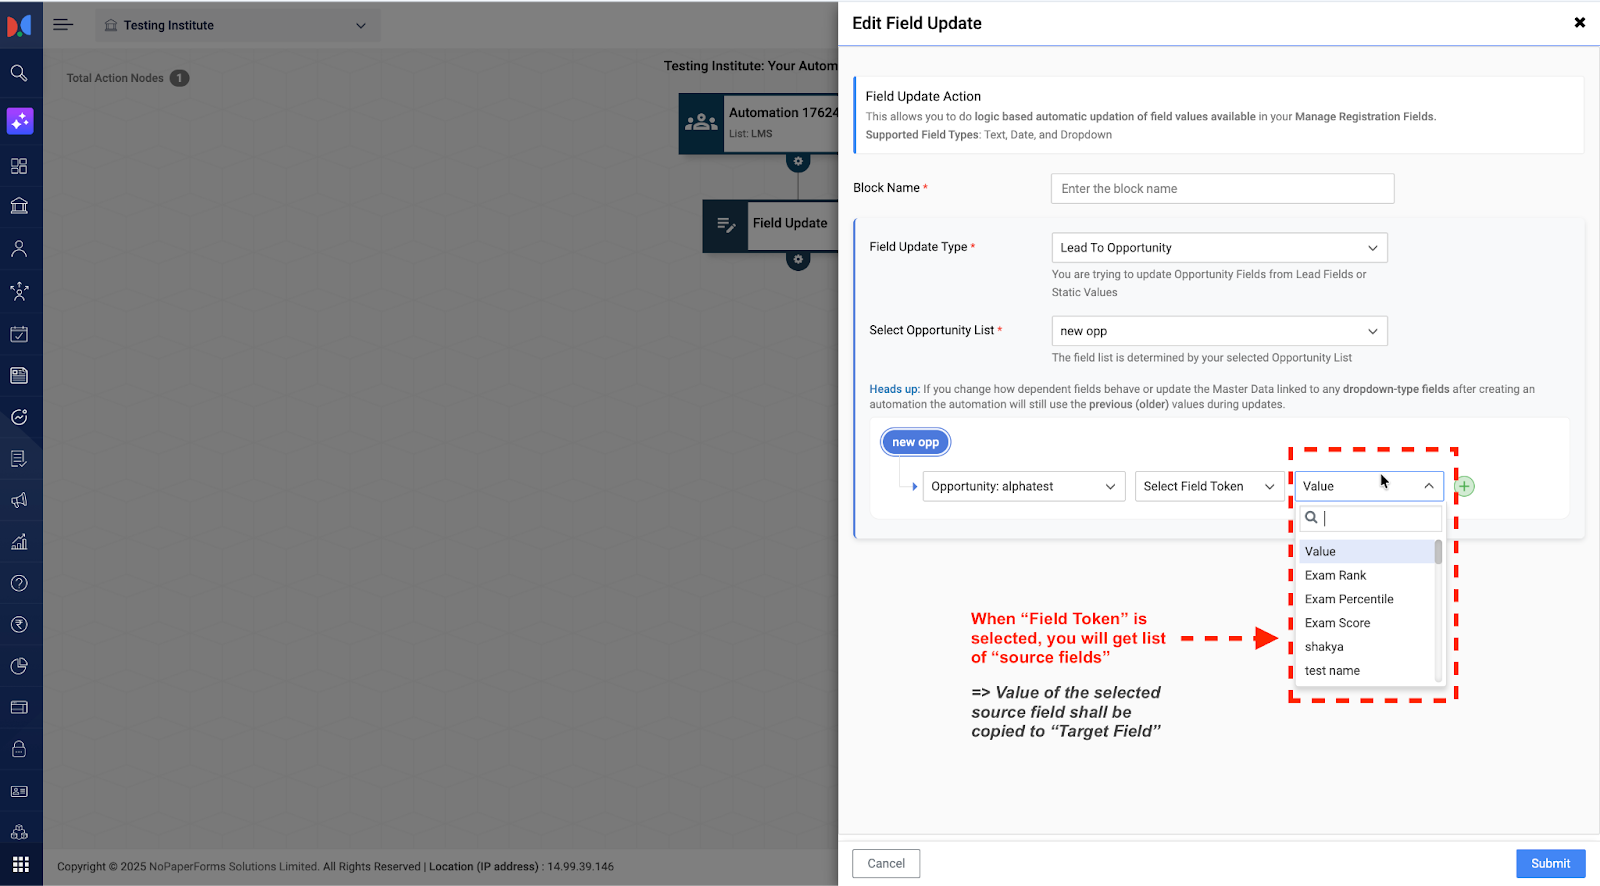
Copy value from another field (via Field Token)
Please note, only text and date type values can be updated via Field Token for now
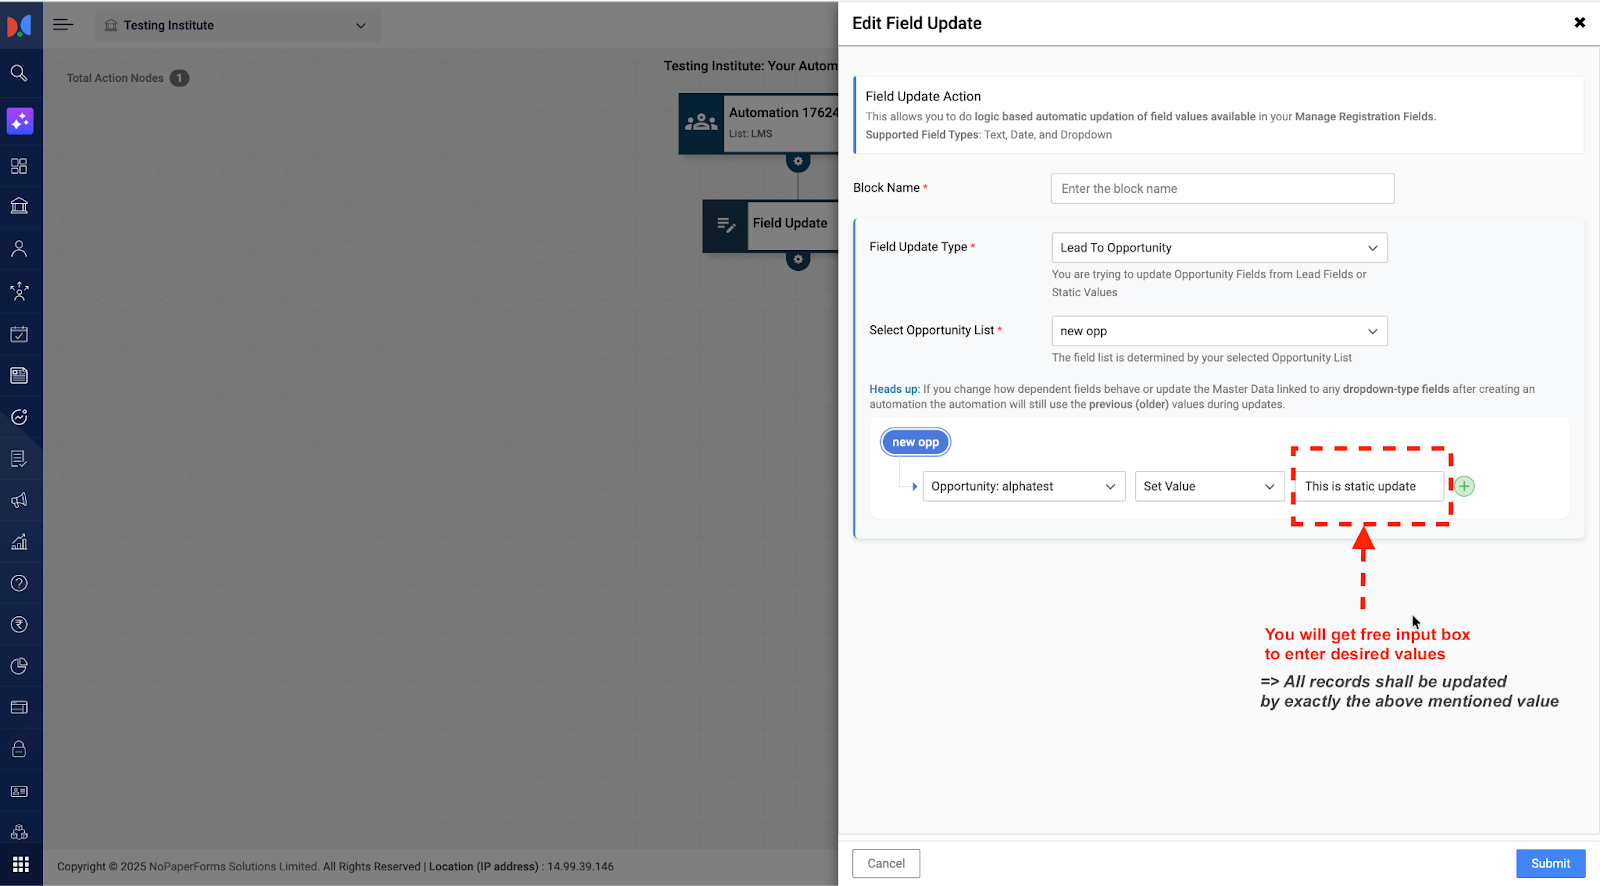
Push a static value (manual input)
All three field types mentioned above (i.e. Text, Date, and Dropdown) can be updated via static value
The dropdown fields that are dependent on the other fields, “parent” field must be updated first to allow the “dependent” field to be updated
Each Field Update Node supports updating up to 7 fields. To update more, you can chain additional Field Update nodes in the same journey.
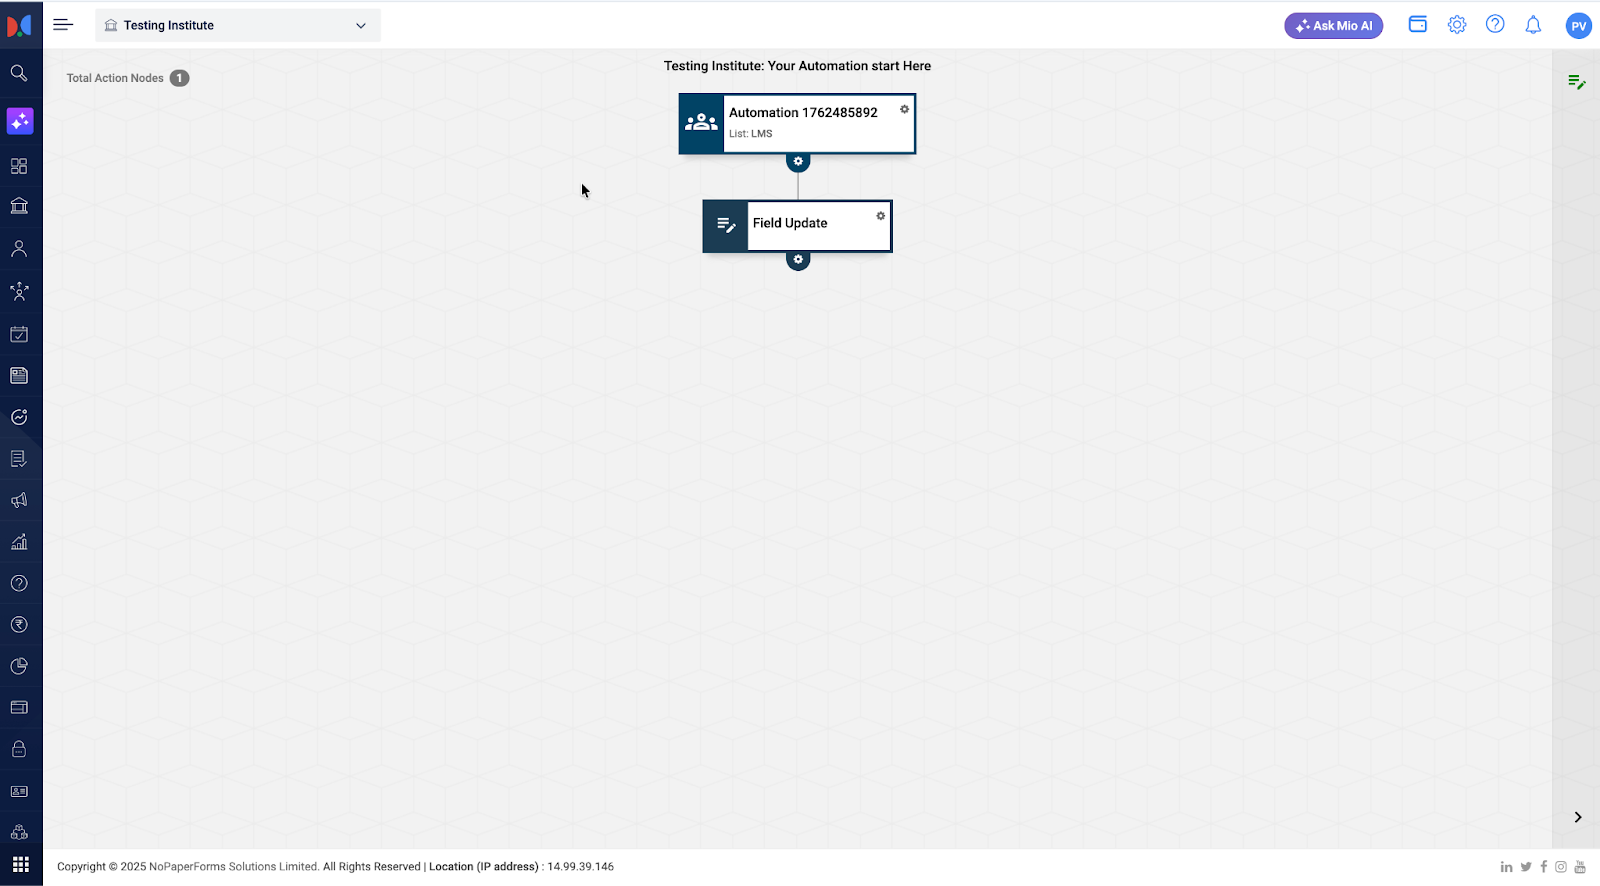
How to Set It Up
Step 1 | Choose your trigger: Lead, Opportunity, or Activity
Step 2 | Add a Field Update Node
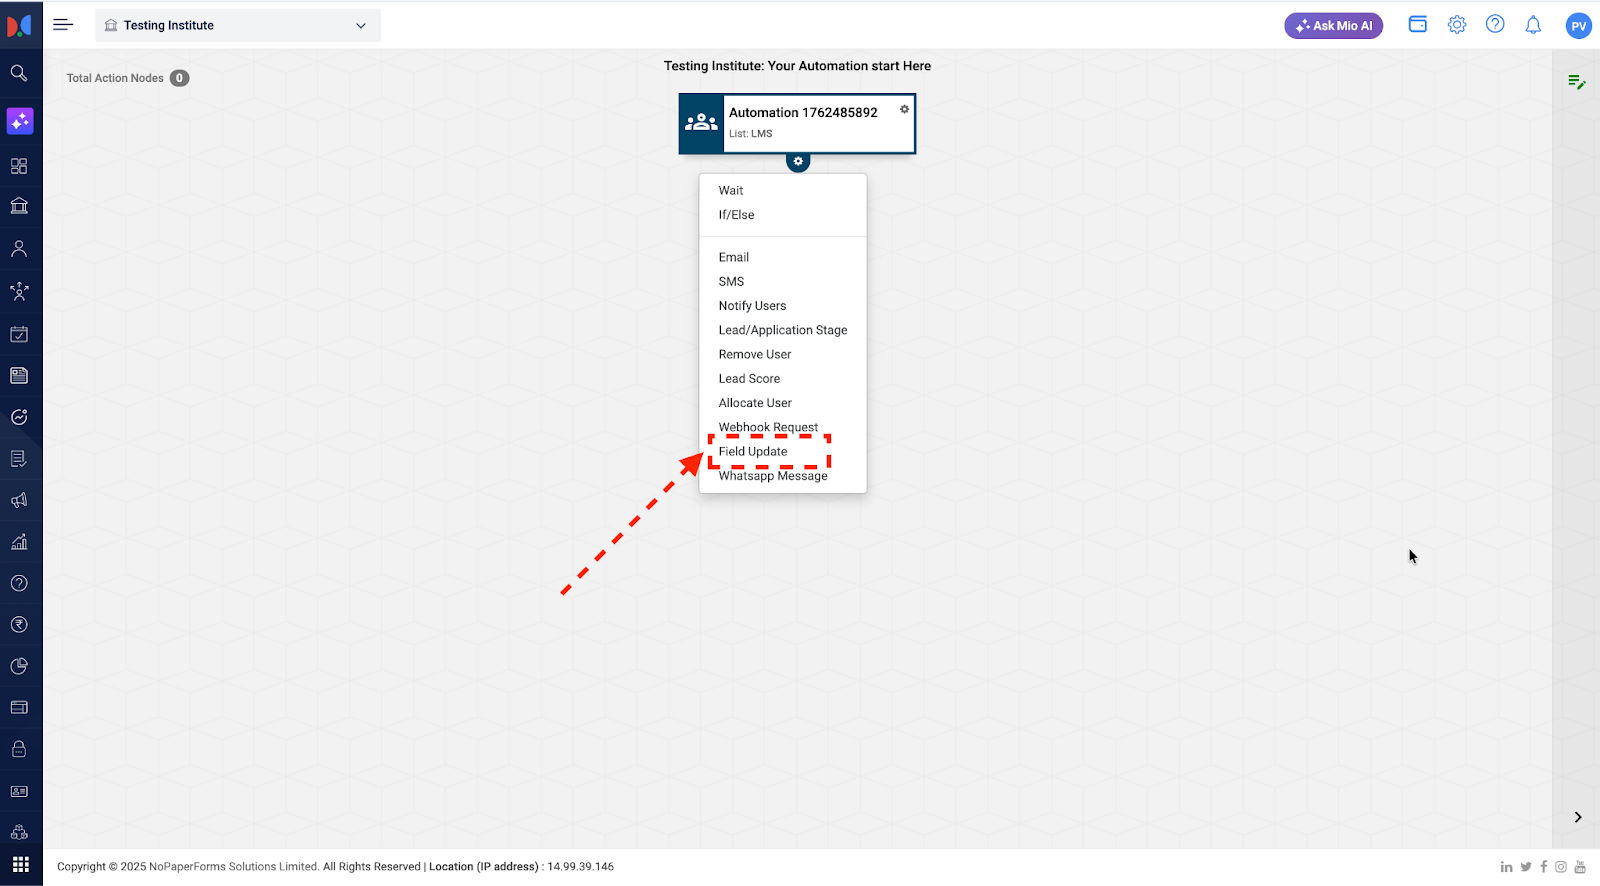
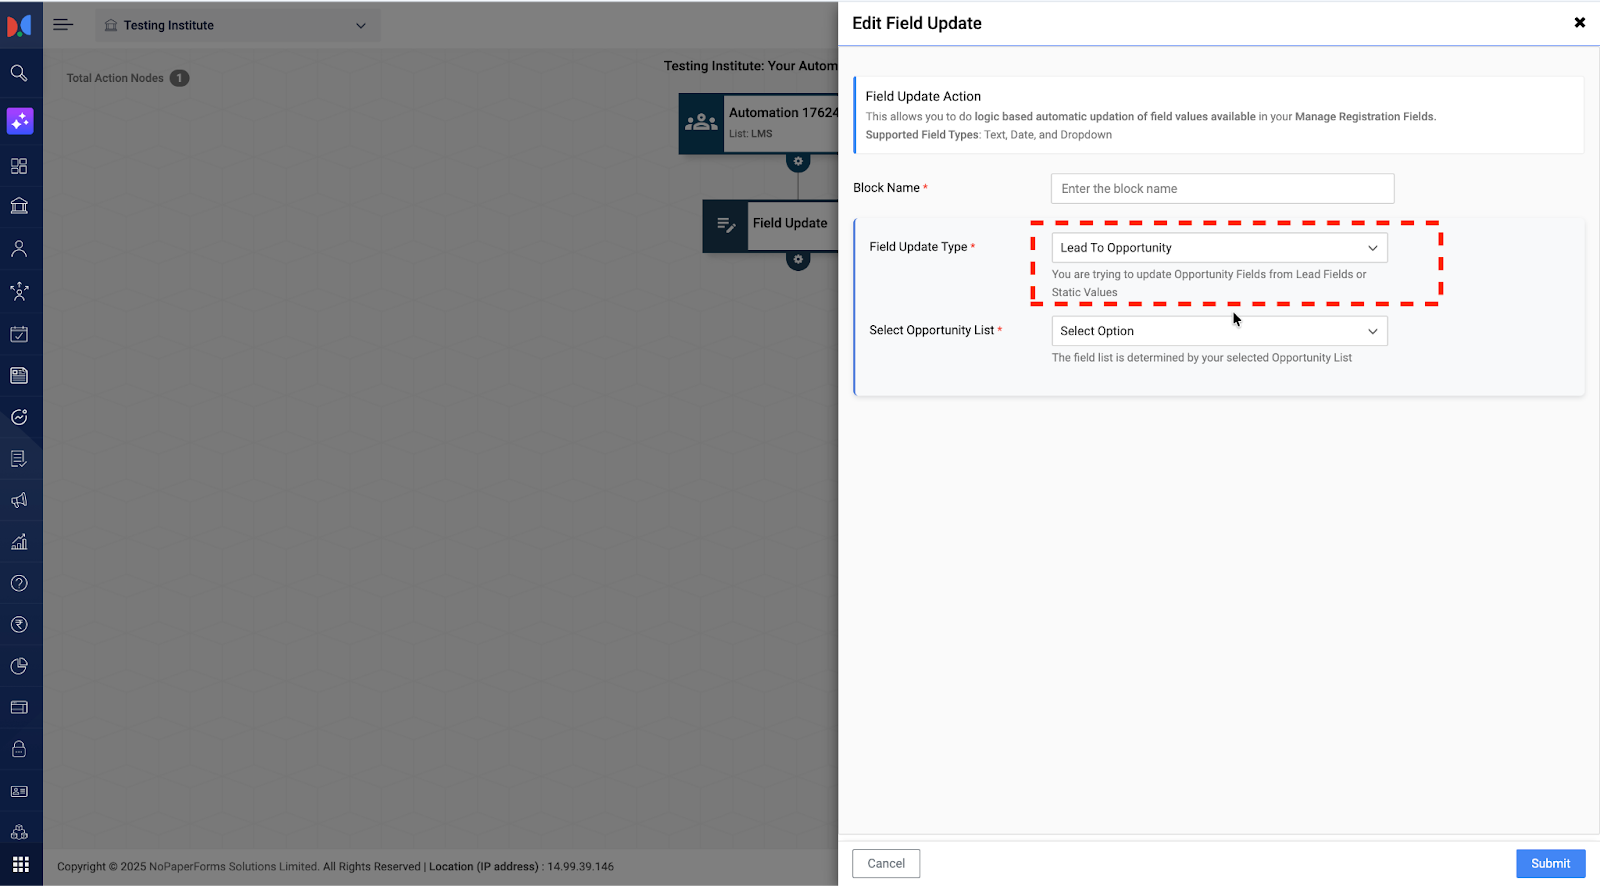
Step 3 | Select the update type (e.g., Lead → Opportunity)
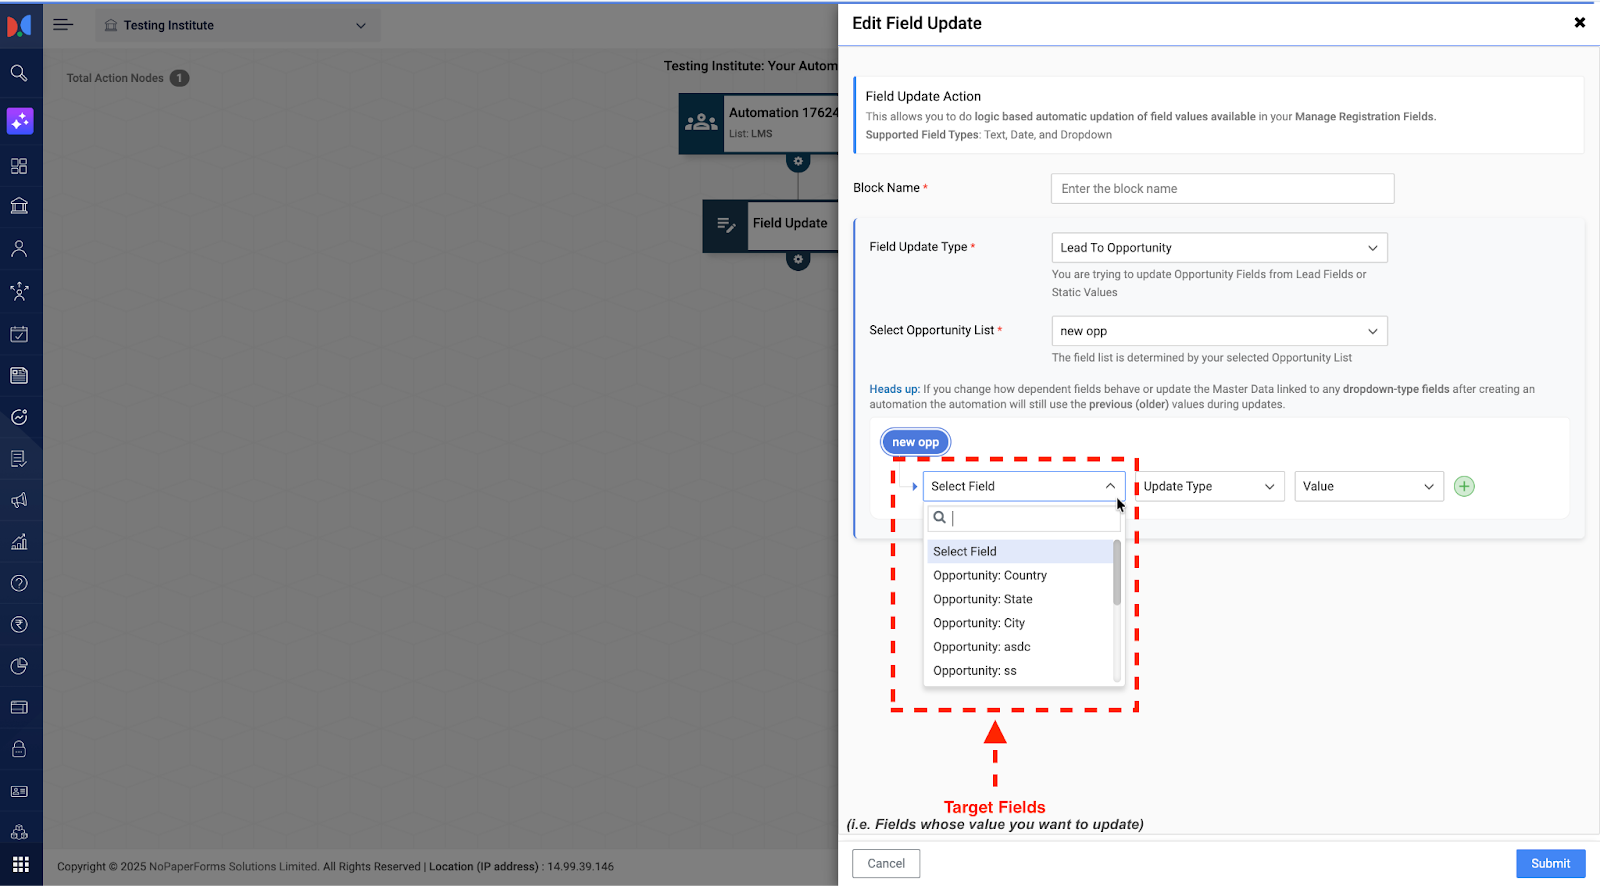
Step 4 | Choose the target field you want to update
Step 5 | Choose your “Update Type”:
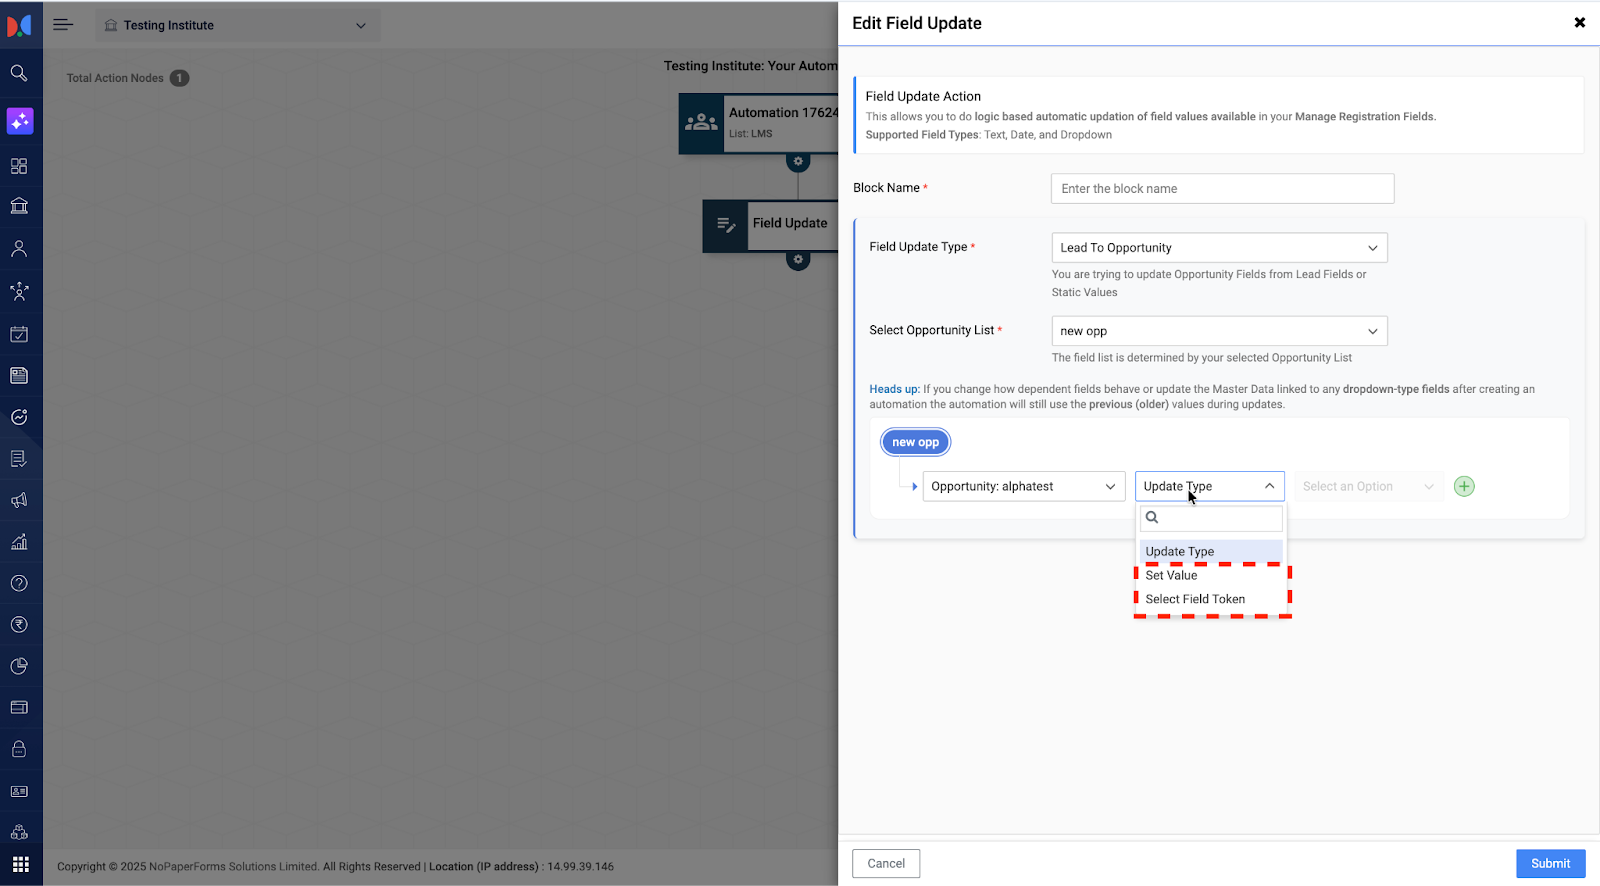
Step 5a | Use a static value (e.g., Region = East)
Step 5b | Use a Field Token to pull data from the source record
Step 6 | Complete the journey by adding more actions, conditions, or emails as needed
Common Mistakes to Avoid
Do not change the “Master Data” of a dropdown field added in the Field Update Node of a published automation. If you need to, please make sure you update “Automation” accordingly. Otherwise, old values shall continue to be updated
Do not change Field validations after publishing the automation. This can lead to field update failures
Do not disable / delete fields added in the field update node
Impact
Reduces manual work
Keeps data consistent across records
Improves follow-ups and segmentation
Makes counsellor workflows faster and more reliable
Supports scalable and automated student journeys
Questions?
If you're unsure about your setup, reach out to your Customer Success Manager for examples and configuration help.
Related Articles
Automations | Field Update | Set Calculations
Overview The Field Update Node now supports Field Calculations — a new capability that lets you perform real-time mathematical operations within automations. Until now, you could: Set Value → enter a fixed input (e.g., Region = East) Set Field Token ...How to Create Marketing Automation?
Introduction: Marketing Automation is tool to streamline, automate and communicate which provides a personalized experience for students & accelerate students in their enrollment journey. So, let’s dive in to know more about how to create Marketing ...Opportunity Stage Change through Automation
Overview New Opportunity Stage Change action node is introduced within the automation. This enhancement allows users to automatically update the Opportunity Stage through automation, bringing the same level of flexibility that has long been available ...How to Extend the Marketing Automation End Date?
Introduction Marketing Automation is a module designed by Meritto to help institutes nurture leads and enhance student enrollments effectively and efficiently across multiple channels, i.e. Email, SMS, and WhatsApp. Start Date of Automation The ...How to Update Data in Bulk?
Overview Bulk Data Update feature empowers you to update multiple records at once—streamlining operations and improving overall efficiency. Whether you need to update lead statuses, assign counselors, or change lead stages, this feature simplifies ...